
In the college kitchen with Jenna Craig: Pie > most other things
Quick math lesson:
Pie > most other things
Disclaimer: pies are very easy to make, but can be very time consuming. Save yourself the trouble, make the pie crust 2 days before you plan to eat the pie, and the pie one day before you plan to eat the pie. Unless it requires meringue, then simply devote the 6 hours before you plan on eating a pie to various stages of prepping.
CRUST
The key to a great homemade pie is in the crust.
2 2/3 cups flour
1/2 tsp salt
1 cup (1 stick) of crisco (COLD)
1/3 cup of water (COLD)
In large bowl, work together first three ingredients with fork (you will give up after like 2 minutes and use your hands–so go ahead and dive in) until mixture resembles coarse meal. Slowly add water while working together with fork/hands. Begin gathering the mixture with your hands and form into two parts. (If the mixture isn’t clinging together, don’t freak out just add more water).
Roll out between floured wax or parchment paper until the size covers the pie plate. You can test the size by turning the pie plate upside down on top of the crust and making sure there is about an inch of excess crust all the way around the pie plate’s edge. Peel off the top layer of paper, run one hand beneath the crust and the other to hold the plate on top. Swiftly flip this while operation over. Peel what is now the top layer of paper off and Voila–you can add your filling. Repeat for top crust.
Tips:
Pay attention to the temperature of the room, the surface you are working on, and especially the temperature of your own hands. In order for the crust to be manipulated, it needs to be cold.
If you get frustrated, just form the crust back into a ball, and start to roll it out all over again.
If this seems too difficult for you, or you don’t want to discover chunks of flour in your hair later in the day, you have the following choices:
1. Crushed graham crackers or vanilla wafers mixed with melted butter and pressed against the sides of a pie plate
2. Store-bought crust. It ends up being prettier, but when you tell someone you’ve made them a homemade pie, you have to question whether or not that is completely true.
3. Shamelessly eating straight-up pie filling (this one is my personal favorite).
FILLING
Filling can be whatever you want. If you can dream it, put it in a pie and email me to tell me how it tastes. I was at Lucy’s Fried Chicken the other night, and they had Sweet Tea Pie on their menu–no joke. Think about quiche: One day the French were like, we are out of fruit, but we want pie. So they drank a lot of wine and thought that eggs would be a good substitute for fruit. And it was! A lucky day for humanity, I say.
I make pies fairly often, so I’ll post more and more recipes as they come up in season or occasion, but for now another super-easy family recipe. You can use this recipe with any berry, so long as it’s sweet to taste before you bake it, and it basically comes out of the oven tasting like a Pop Tart blessed by the very gods that brought us Ryan Gosling. My favorite, brazosberries–which is a wild-growing giant blackberry-like fruit that is native to Texas. Though brazosberries can only be harvested in early spring, HEB carries blackberries all year long, and you generally don’t see any snakes “picking” blackberries at HEB.
Berry Pie
1 1/2 cup granulated sugar
1/2 cup flour
2 cups washed berries.
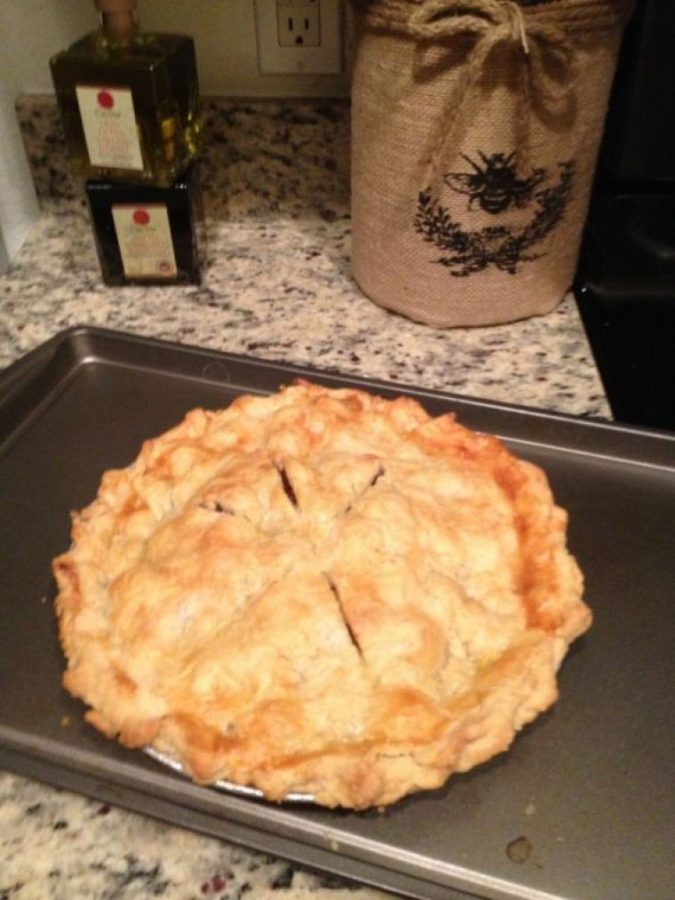
In a large bowl, thoroughly mix sugar and flour together. Add berries, mixing together and crushing about half the berries. If the filling isn’t sweet to taste, add more sugar as berries can be fickle. Pour into crust-lined plate, and top with other half. Seal the edges together by either pinching both crusts together, or using a fork to push both layers together against the edge of the plate. Cut slits, or prick with fork in the top crust for ventilation.
Bake at 425° for 40-45 minutes, or until the edges of the crust are browned.
Be sure the pie is completely cooled (probably a good 2-3 hours) before cutting into it. Otherwise its still gooey and the whole thing collapses and it’s real sad.